kaedeasset/KaedeVN 0.2.0
版Version: 0.2.0
言語: 日本語Language: English
目次Contents

KaedeVN 導入ガイド

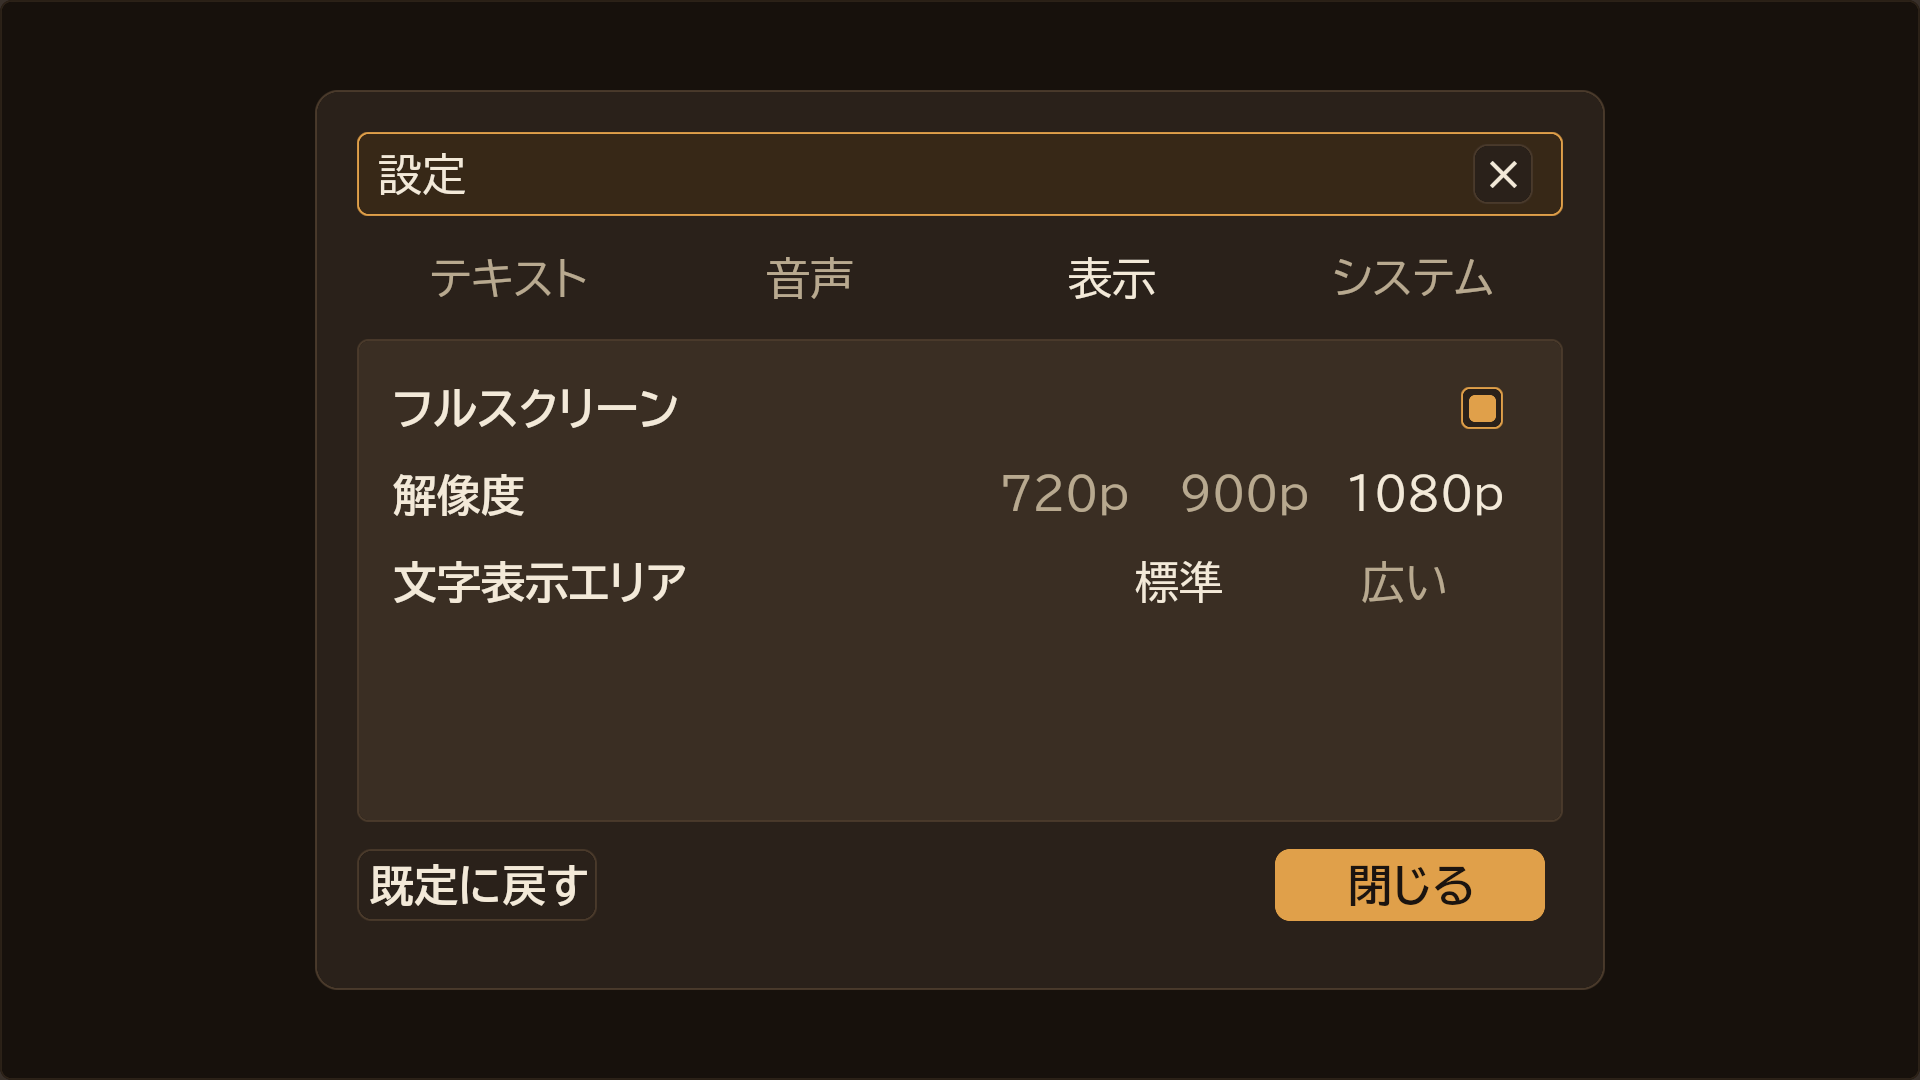
この説明書は KaedeVN 0.2.0(2026-10-21)のものです。

Unreal Engine の中でノベルゲームを作る、無料のプラグインです。このガイドは、Fab で入れてから見本の作品を動かし、Windows のゲームとして書き出すまでの手順です。
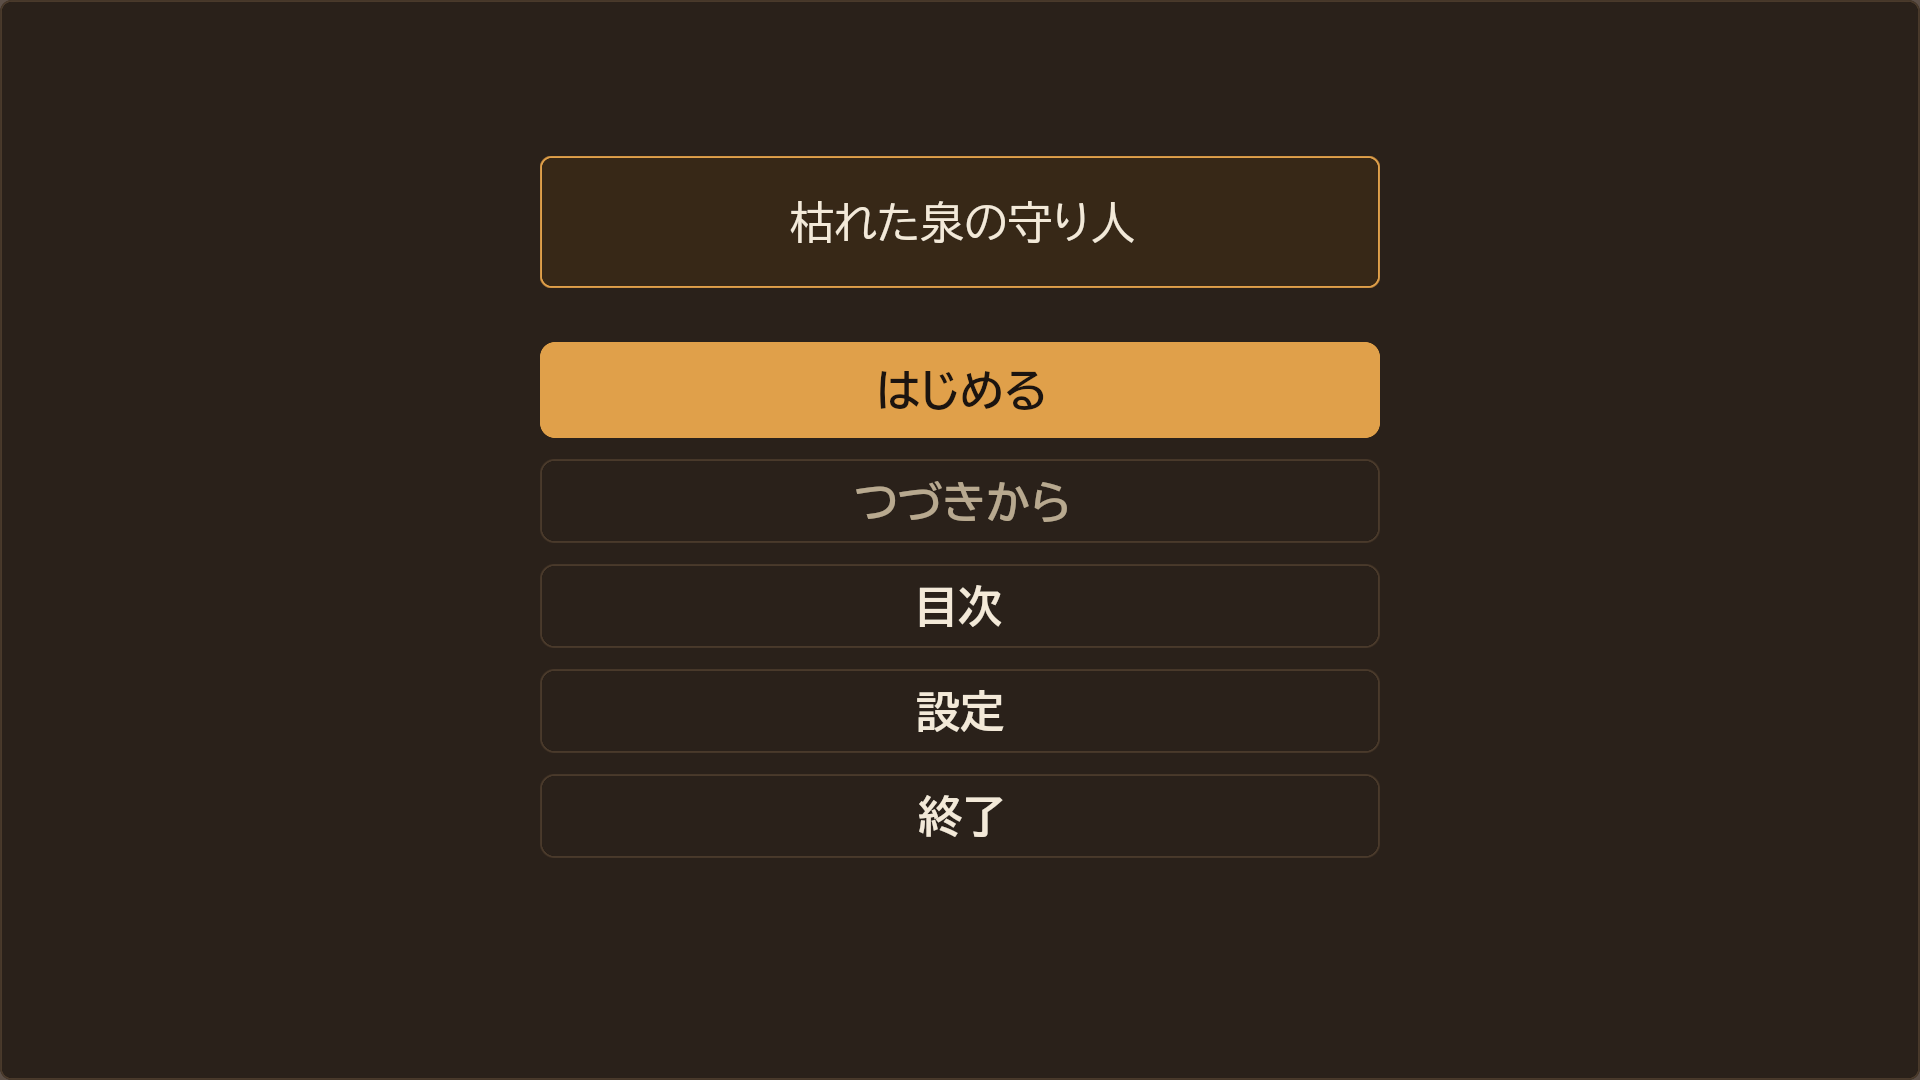
見本の作品「枯れた泉の守り人」のタイトル画面


目次

  1. はじめての一本道(入れてから書き出すまで)
  2. このプラグインでできること
  3. 要るもの
  4. 作品のフォルダ
  5. ゲームの操作
  6. テキストで書く(KS 台本)
  7. まだできないこと
  8. 困ったとき

1. はじめての一本道(入れてから書き出すまで)

UE(Unreal Engine)で KaedeVN を初めて使う人が、Fab で入れてから見本の作品を書き出すまでの順番です。上から順に進めれば、ほかの章を読まずに最後まで行けます。ほかの章は、自分の作品を作るときに、必要な所だけ読んでください。

先に全体の順番です。 KaedeVN は単独で起動するアプリではなく、UE のエディタの中で動く道具です。なので「KaedeVN を起動する」という手順はありません。UE でプロジェクトを開き、メニューからノベルエディタを開きます(1.5)。このガイドでは、プログラムを立ち上げることを「起動する」(ランチャー・UE・書き出したゲーム)、動いているプログラムの中で窓や作品を出すことを「開く」(プロジェクト・ノベルエディタ・作品)と書き分けます。

順 やること どこで 終わると
1.1 Fab で KaedeVN と MomijiUI を入れる Fab とランチャー UE に KaedeVN と MomijiUI が入る
1.2 UE 5.8 と Visual Studio を入れる ランチャーと Microsoft のインストーラー プロジェクトを作る準備が整う
1.3 C++ のプロジェクトを作り、KaedeVN を有効にする UE のプロジェクトブラウザとエディタ KaedeVN の入ったプロジェクトが開く
1.4 見本の作品を置く ノベルエディタ 見本「枯れた泉の守り人」が開く
1.5 ノベルエディタの画面を知る ノベルエディタ 4 つの区画の役目が分かる
1.6 台詞を 1 行直して保存する ノベルエディタ 話のファイルが書き換わる
1.7 ビルドして ▶ プレイ ノベルエディタ エディタの中で見本を遊べる
1.8 指摘が出たら直す ノベルエディタ 指摘が 0 件になる
1.9 書き出す(パッケージ化) UE のエディタ Windows の exe ができる

2 回目からは、1.3 で作ったプロジェクトを開き、Tools → KaedeVN → KaedeVN ノベルエディタ(1.5)だけを行います。1.1〜1.4 は最初の 1 回だけです。

1.1 Fab で KaedeVN と MomijiUI を入れる

KaedeVN は画面の描画に、もう 1 つの無料のプラグイン MomijiUI を使います。2 つとも入れます。

  1. Epic Games のアカウントで Fab(fab.com)にサインインし、KaedeVN のページで「ライブラリに追加」します。MomijiUI も同じようにします。どちらも無料です。
  2. Epic Games Launcher(ランチャー)の Unreal Engine → ライブラリ の Fab の欄に 2 つが並びます。それぞれ エンジンにインストール を押し、5.8 を選びます。プラグインは <UE のフォルダ>\Engine\Plugins\Marketplace\ の下に入ります。

UE 5.8 がまだ入っていなければ、先に 1.2 の手順 1 を済ませてから戻ってください。

1.2 UE 5.8 と Visual Studio を入れる

  1. ランチャーの Unreal Engine → ライブラリ で、エンジンのバージョンの + を押し、5.8 を選んで インストール します。
  2. Microsoft のサイトから Visual Studio Community(無料)のインストーラーを取ってきて起動し、ワークロードの C++ によるゲーム開発 に印を付けて入れます。版は 2022 の最新(17.14)か 2026 の最新にします(UE 5.8 は、古い版の一部〔2022 の 17.13 以前・2026 の初めの版〕を組み立てに使いません。もう入っているなら Visual Studio Installer の 更新 を押します)。KaedeVN は C++ のプラグインなので、プロジェクトを C++ で作り(1.3)、書き出すときもこのプラグインのコードをゲームに組み込みます(1.9)。そのために要ります。

1.3 C++ のプロジェクトを作り、KaedeVN を有効にする

  1. ランチャーで 5.8 の 起動 を押します。
  2. プロジェクトブラウザで ゲーム → 空のプロジェクト(Blank)を選び、C++ を選びます。プロジェクトの名前は英数字と _ だけ(例 MyNovel)にして 作成 を押します。Visual Studio がプロジェクトのコードを組み立て、エディタが開きます。
  3. エディタの 編集 → プラグイン で KaedeVN を探し、印を付けて有効にします。KaedeVN に要る MomijiUI も有効にするかを聞く窓が出たら はい を押します。
  4. 「再起動が必要」と出るので、エディタを開き直します。同じプロジェクトを開きます。

プラグインはエンジンに入っただけでは使えず、プロジェクトごとに有効にします。有効にするのは、プロジェクトを作った最初の 1 回だけです。

1.4 見本の作品を置く

  1. メニュー Tools → KaedeVN → KaedeVN ノベルエディタ(日本語の表示では ツール)を選びます。ノベルエディタがタブで開きます。どのマップを開いていても使えます。
  2. 上の段の 見本を置く を押します。プラグインに入っている見本の作品「枯れた泉の守り人」(1 章 1 話)が、プロジェクトの Game フォルダ(作品の置き場。§4)へ写され、開きます。前からあるファイルは上書きしません。
  3. 左上の 作品: の欄に 枯れた泉の守り人 が出ていれば、置けています。

1.5 ノベルエディタの画面を知る

ノベルエディタは 4 つの区画に分かれています。

区画 何があるか
① 左 作品の中の 章(フォルダ)→ 話(ファイル) の木
② 中 選んだ話の ブロックの列(台詞・背景・立ち絵・分岐など)
③ 右上 選んだブロックの 欄
④ 右下 プレビュー(欄を直すとすぐ描き直す)

① で章「01_第1章」を開き、話「01_枯れた泉」を選ぶと、② にブロックが並びます。
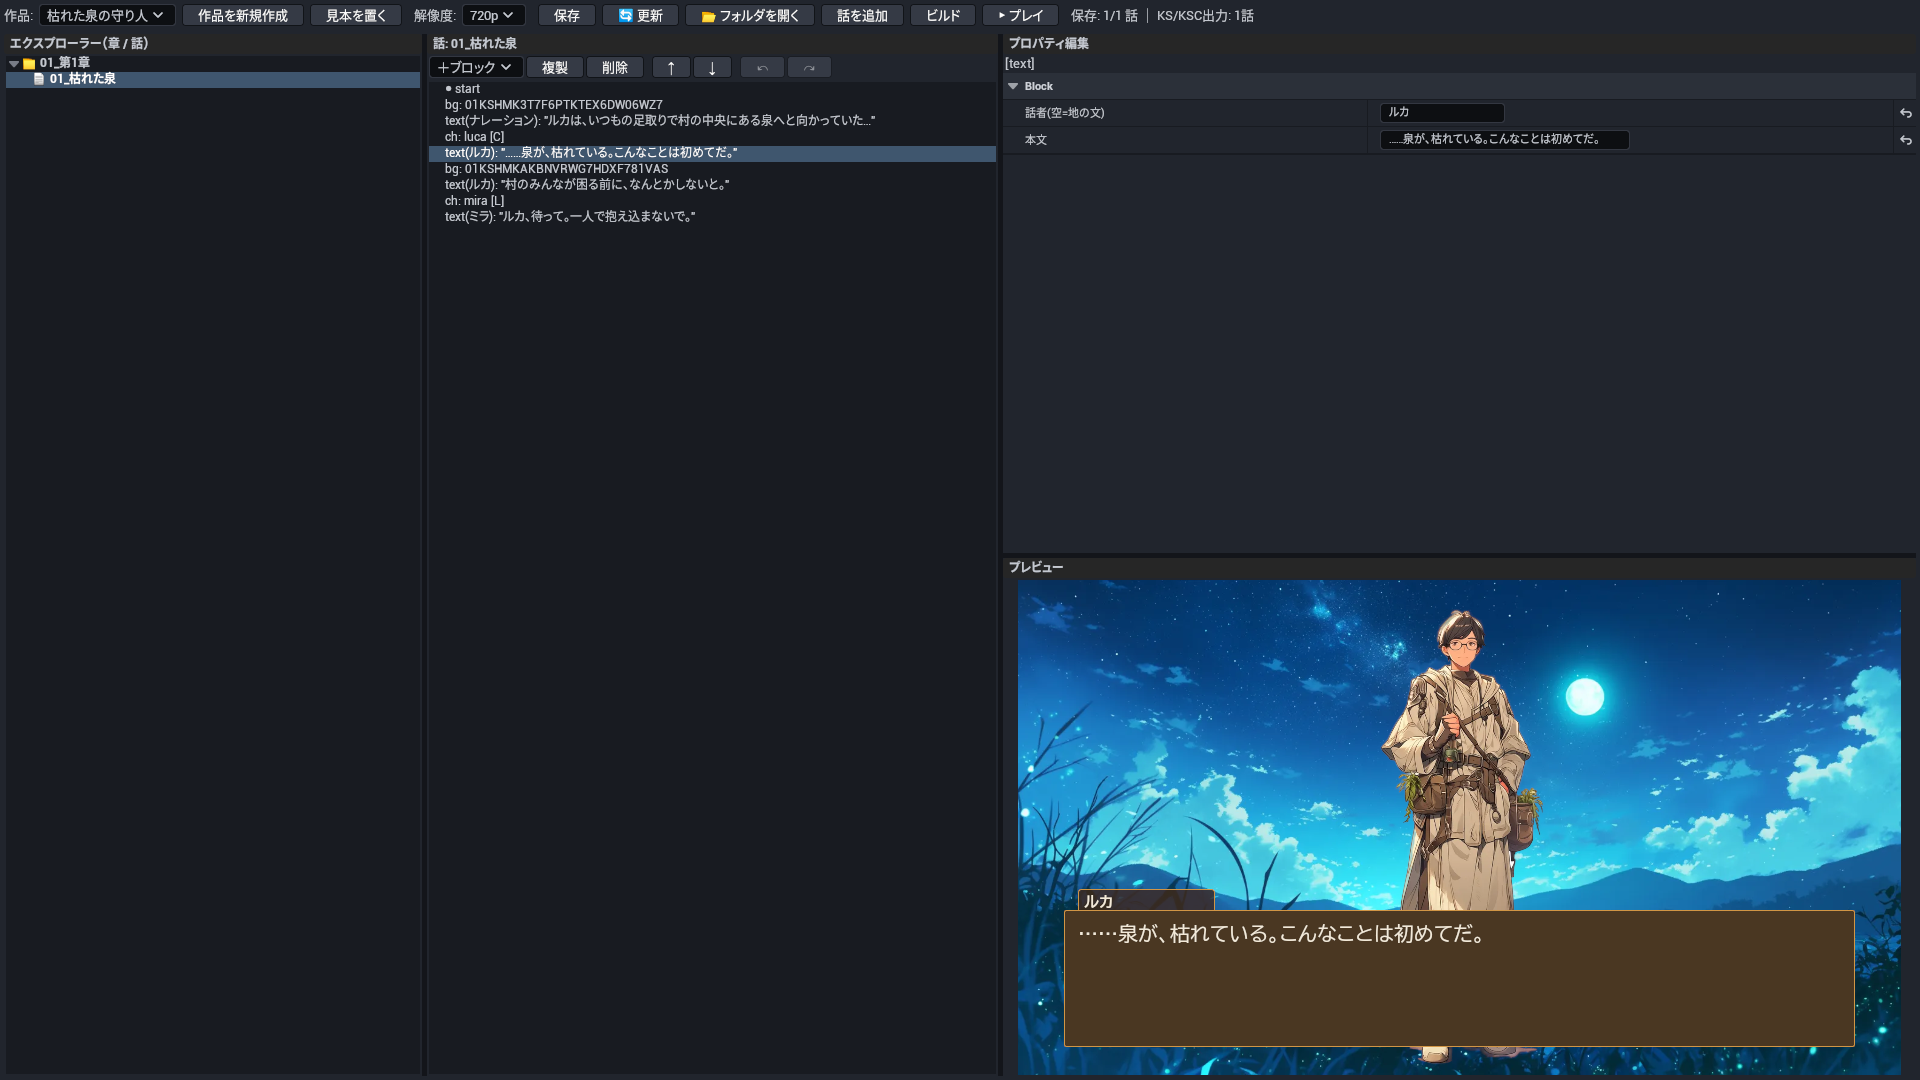
ノベルエディタ。① 章と話の木・② ブロックの列(台詞を選んだ所)・③ 欄・④ プレビュー

1.6 台詞を 1 行直して保存する

  1. ② で text のブロック(台詞)を 1 つ選びます。
  2. ③ の 本文 を書き換えます。④ のプレビューがすぐ変わります。話者(空=地の文) の欄は、台詞を言う人の名前です。
  3. Ctrl+S(または 保存)で保存します。話のファイル(.json)と一緒に、同じ中身の文字の台本(.ks・.ksc)も同じフォルダに書かれます。

ブロックは +ブロック で足せます(選んだブロックの次に足します)。足せるのは、台詞(text)・背景(bg)・立ち絵(ch)・変数(set_var)・ジャンプ(jump)・条件分岐(if)・選択肢(choice)の 7 種です。Ctrl+Z/Ctrl+Y で元に戻す・やり直すができます。

1.7 ビルドして ▶ プレイ

  1. ビルド を押します。作品全部(章の順 → 話の順)が Game/works/fantasy_block_demo/scenario.json に組まれ、検査が回ります。
  2. ▶ プレイ を押します。ビルドしてから、エディタの中(PIE)で見本が始まります。マップは今開いているマップのままで構いません。
  3. タイトル画面の はじめる を押し、クリック・Enter・Space で読み進めます(見本は背景・立ち絵・台詞 4 つの短い 1 話です)。1.6 で直した台詞が出ることを確かめたら、エディタのツールバーの 停止(■)で戻ります。
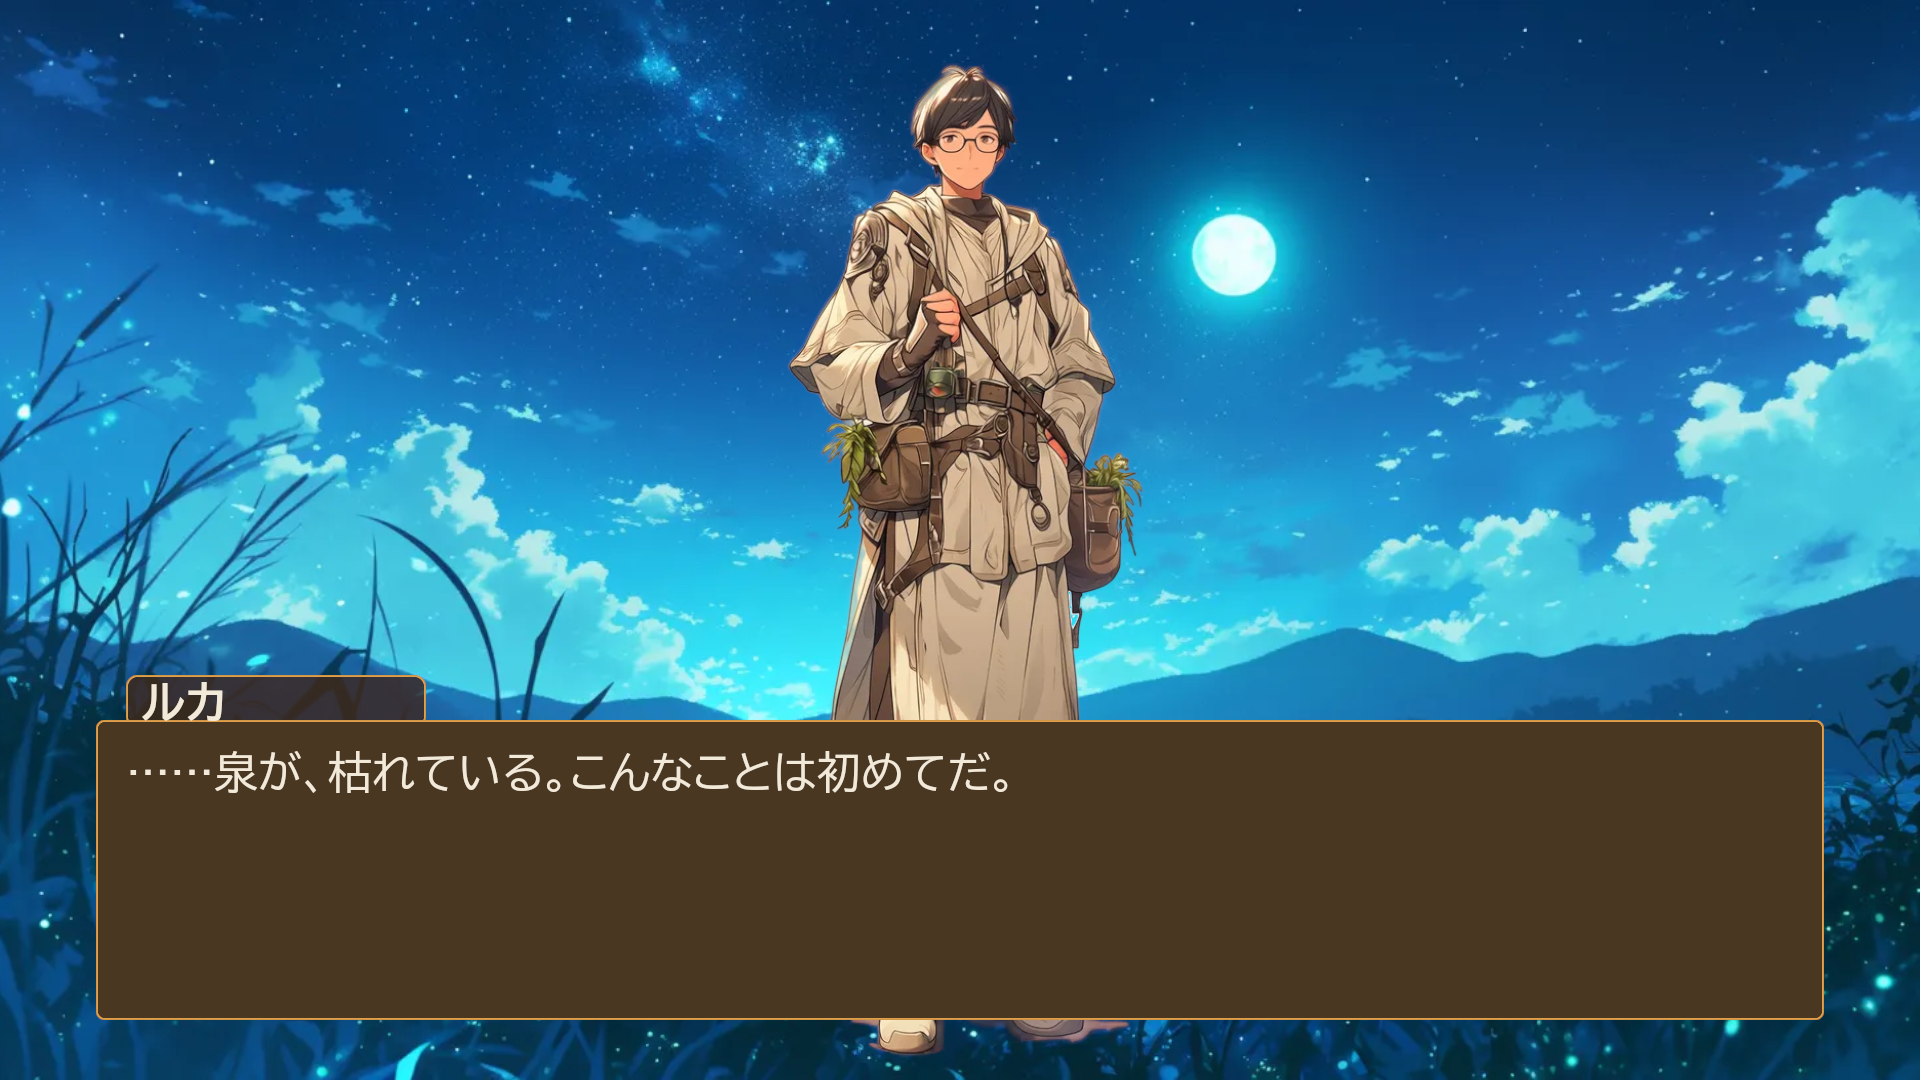
見本を遊んでいる所。背景・立ち絵・名前の窓と本文

1.8 指摘が出たら直す

ビルドは、「組めるのに遊ぶとおかしくなる所」を検査します(素材が無い・本文が空・飛び先の話が無い など 15 種)。見つかったものはノベルエディタの下に一覧で出ます。行を押すと、その話を開いてそのブロックを選びます。 ③ の欄を直して、もう一度 ビルド します。指摘はビルドを止めません。見本のままなら指摘は 0 件です。
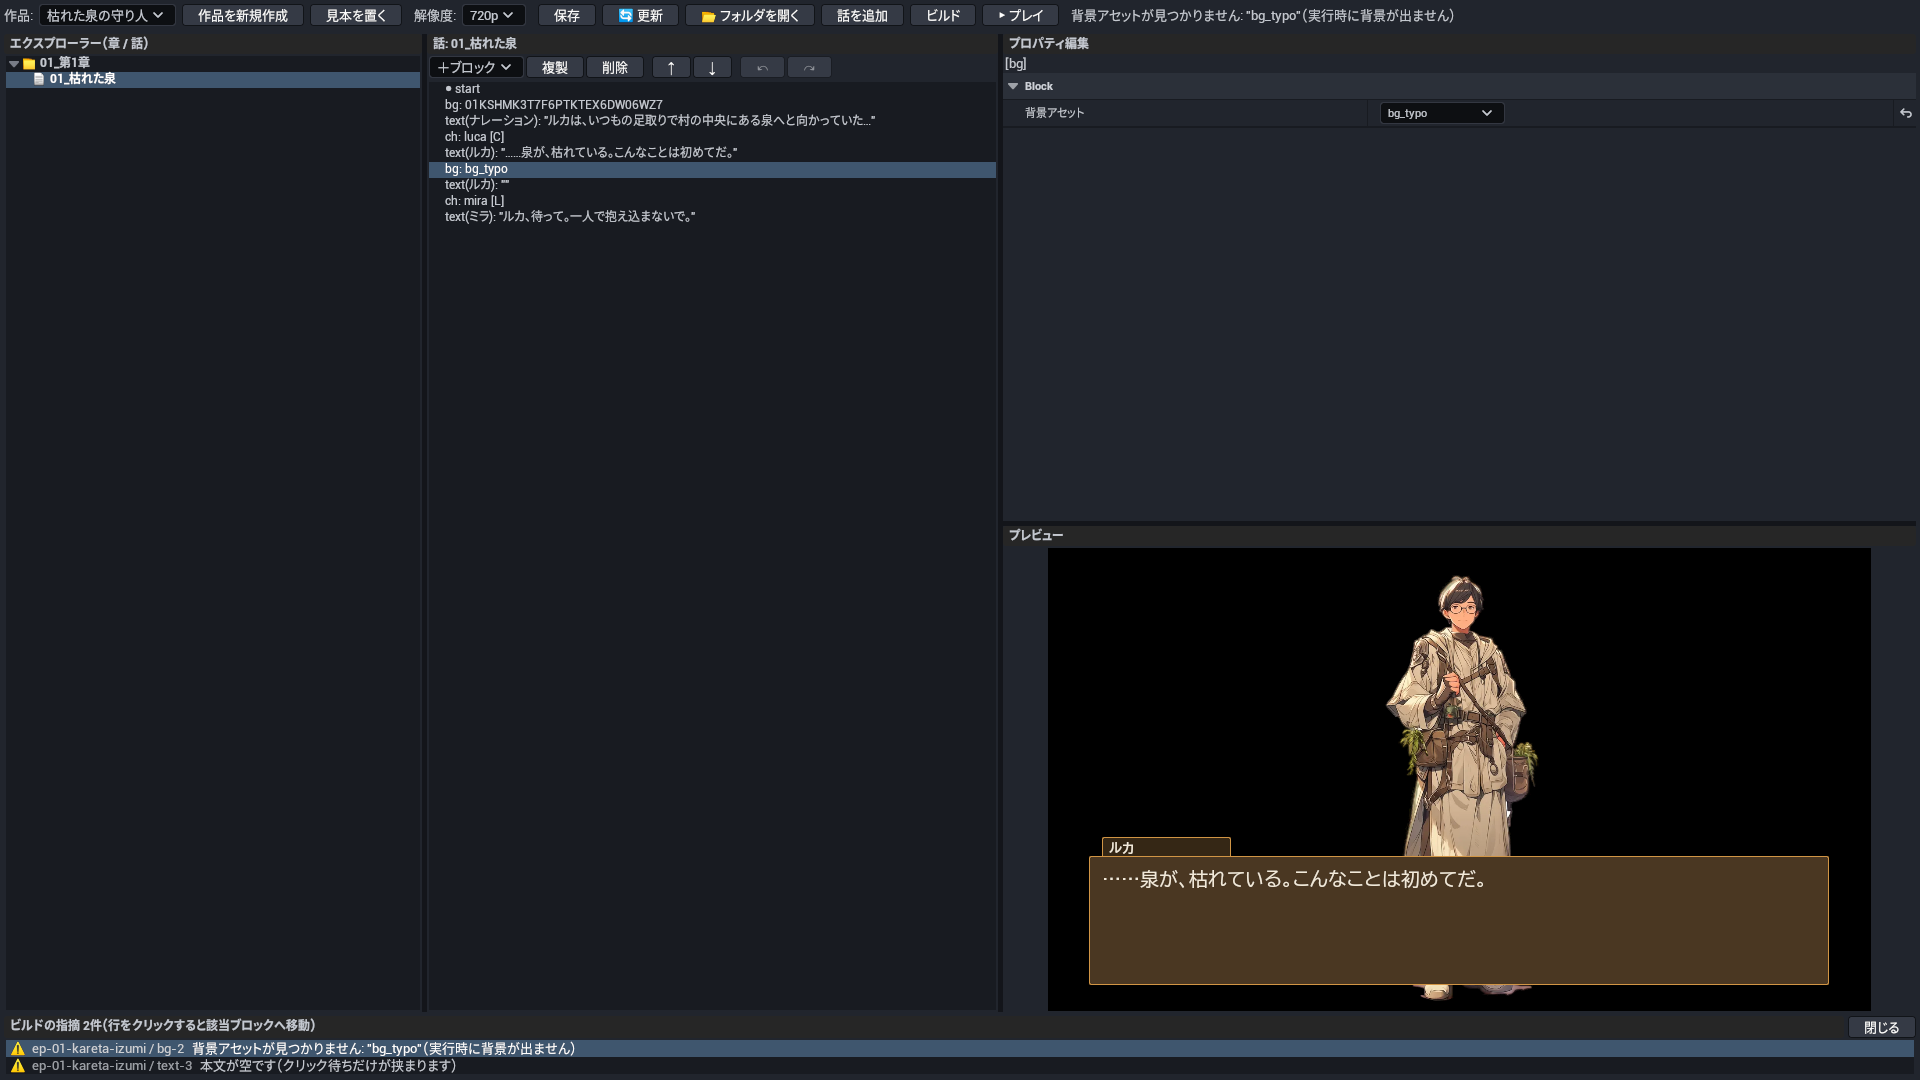
ビルドの指摘の一覧。見本の写しに誤りを 2 つ(背景の id の打ち間違い・空の本文)入れてビルドし、1 つ目の指摘を押してそのブロックを選んだ所

1.9 書き出す(パッケージ化)

エディタの中で遊べたら、Windows のゲームとして書き出します。設定は最初の 1 回だけです。

  1. ゲームのマップを作る: ファイル → 新規レベル → 空のレベル を選び、ファイル → 現在のレベルを保存 で Content の下に保存します(例 NovelMap)。

  2. ゲームの土台を KaedeVN にする: 編集 → プロジェクト設定 → マップ & モード で、デフォルトの GameMode を KaedeVnGameMode に、ゲームのデフォルトマップ を手順 1 のマップにします。ノベルの画面と操作(キーボード・マウス・ゲームパッド)は、この GameMode がつなぎます。

  3. 作品の置き場をゲームに入れる: プロジェクトのフォルダの Config/DefaultGame.ini をメモ帳で開き、末尾に次の 2 行を足して保存します。この行が無いと、書き出したゲームは起動しても台本が見つかりません。

    [/Script/UnrealEd.ProjectPackagingSettings]
    +DirectoriesToAlwaysStageAsUFS=(Path="../Game")
    
  4. 起動する作品を決める: プロジェクトのフォルダの Game に projects というフォルダを作り、その中に projects.json を次の中身で作ります(文字コードは UTF-8)。書き出したゲームは、この一覧の先頭の作品を遊びます。

    {
      "projects": [
        { "id": "fantasy_block_demo", "title": "枯れた泉の守り人", "scenario": "works/fantasy_block_demo/scenario.json" }
      ]
    }
    
  5. ノベルエディタで ビルド をもう一度押し、scenario.json を新しくします。

  6. プラットフォーム → Windows → プロジェクトをパッケージ化 で、出力先のフォルダを選びます。配る版にするときは、同じメニューのパッケージ化の構成を Shipping にします。Visual Studio がこのプラグインのコードをゲームに組み込みます。

  7. 出来たフォルダの exe を起動すると、見本のタイトル画面から始まります。

書き出したゲームのログとセーブは、exe の隣でなく %LOCALAPPDATA%\<プロジェクトの名前>\Saved に書かれます。

自分の作品は、ノベルエディタの 作品を新規作成 で作り、1.6〜1.9 と同じ順で直して遊んで書き出します(手順 4 の一覧の id・題・scenario を自分の作品に替えます)。


2. このプラグインでできること

UE で動くものだけを書いています。 台本に書けても UE ではまだ何もしない命令は §7 にあります。

分野 できること
ノベルエディタ 作品 › 章 › 話 › ブロックで組む。ブロックは 7 種(台詞・背景・立ち絵・変数・ジャンプ・条件分岐・選択肢)。欄を直すとすぐ描き直すプレビュー。元に戻す/やり直す(話ごと)。章はフォルダ・話はファイルなので、エディタの外でも並びが読める。作品の画面の大きさ(720p・1080p)
ビルドの検査 組めるのに遊ぶとおかしくなる所を 15 種知らせる(素材が無い・本文や選択肢の文が空・飛び先の話が無い・id の重なり など)。行を押すとそのブロックへ移る。ビルドは止めない
KS 台本 1 話 1 ファイルの文字の台本(.ks)。命令・台詞・話者・ラベル・変数・選択肢・条件分岐を書ける。ノベルエディタの保存でも同じ中身の .ks が書かれる
KS 台本エディタ 台本の行を木で見せ、選んだ行の欄・プレビュー・検査(8 種)を並べる。KS 台本エディタは文字を書き換えない(KS で書いた台本の正は文字のファイル)
同梱のコンパイラ KS 台本エディタのビルドが使う kaedevn-ks-compile.exe(KS 台本 → scenario.json)と、ノベルエディタの保存が使う kaedevn-blocks2ks.exe(ブロック → KS の文字)。外の道具は要らず、ネットワークに出ない。ノベルエディタのブロックはエディタ自身が scenario.json に組む
絵の演出 背景(溶けこみ)・立ち絵(3 つの立ち位置・表情の差し替え・移動)・スプライト(好きな位置の絵を動かす・透かす・拡大する)・決めた位置の文字・重ね絵(雨・霧・枠など)・レイヤを隠す・透かす・切り替えの溶けこみ
画面の演出 色のフィルタ・揺れ・フラッシュ・暗転と明け(黒・白)・1 色の幕・カメラ(寄る・ずらす)・タイムライン(複数の動きを時間に沿って並べた演出)
流れ 台詞と地の文・文字送り・改行と改ページ・クリック待ち・時間の待ち・選択肢・変数と条件分岐・ジャンプ・呼び出しと戻り・KSC(台本の中の小さなスクリプト。旗・持ち物の数・計算)
ゲームの画面 タイトル・メニュー・目次・セーブ・ロード・解説書・コンフィグ(見本の 7 枚。どれも MomijiUI の JSON なので、作品ごとに直せる)。オート・スキップ・クイックセーブ/ロード。コンフィグのうち UE が反映するのは、文字の速さ・書体・窓の大きさ・配色の 4 項目
操作 キーボード・マウス・ゲームパッド(§5)。プラグインが Enhanced Input で割り当てるので、プロジェクトでつなぐことは無い
書き出し Windows のゲーム。ゲームの土台(GameInstance・GameMode・PlayerController)はプラグインの KaedeVnHost

作品は作品の置き場の JSON と文字の台本です(§4)。Git で差分を見られます。
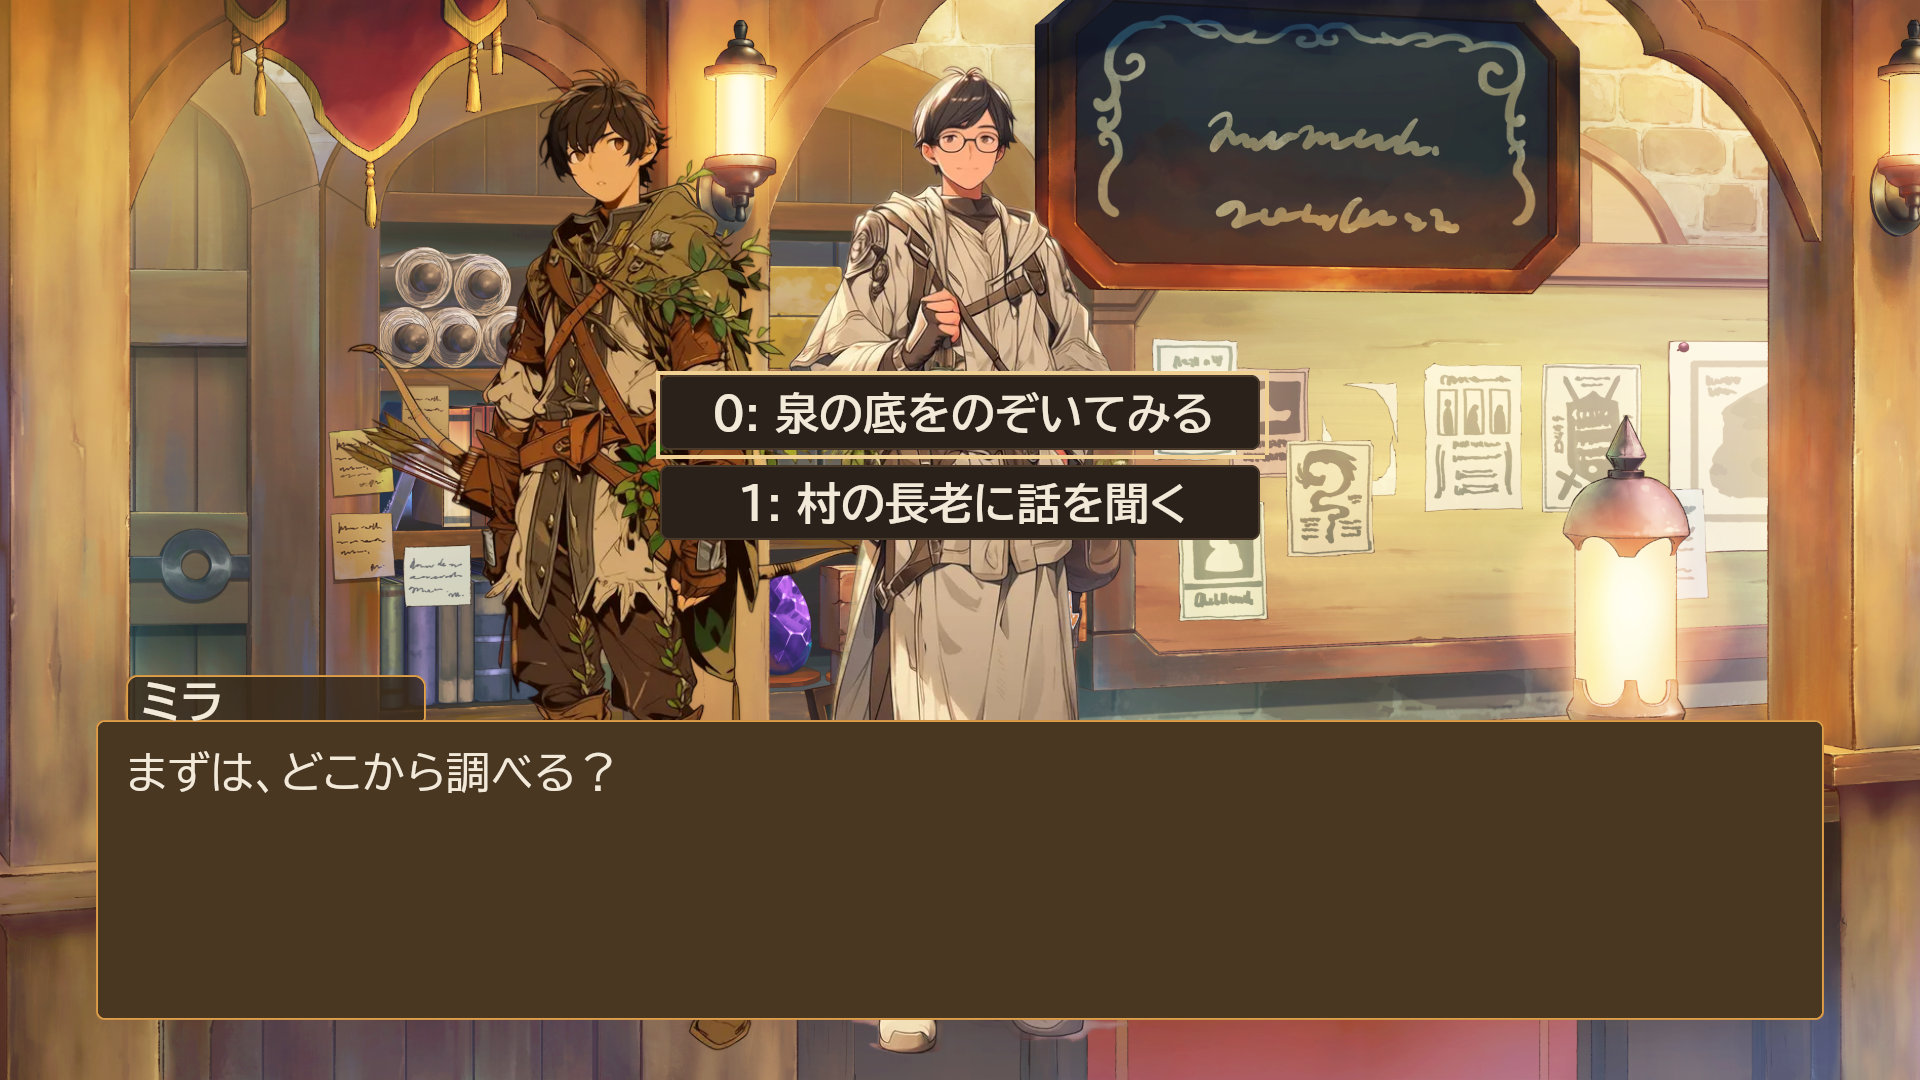
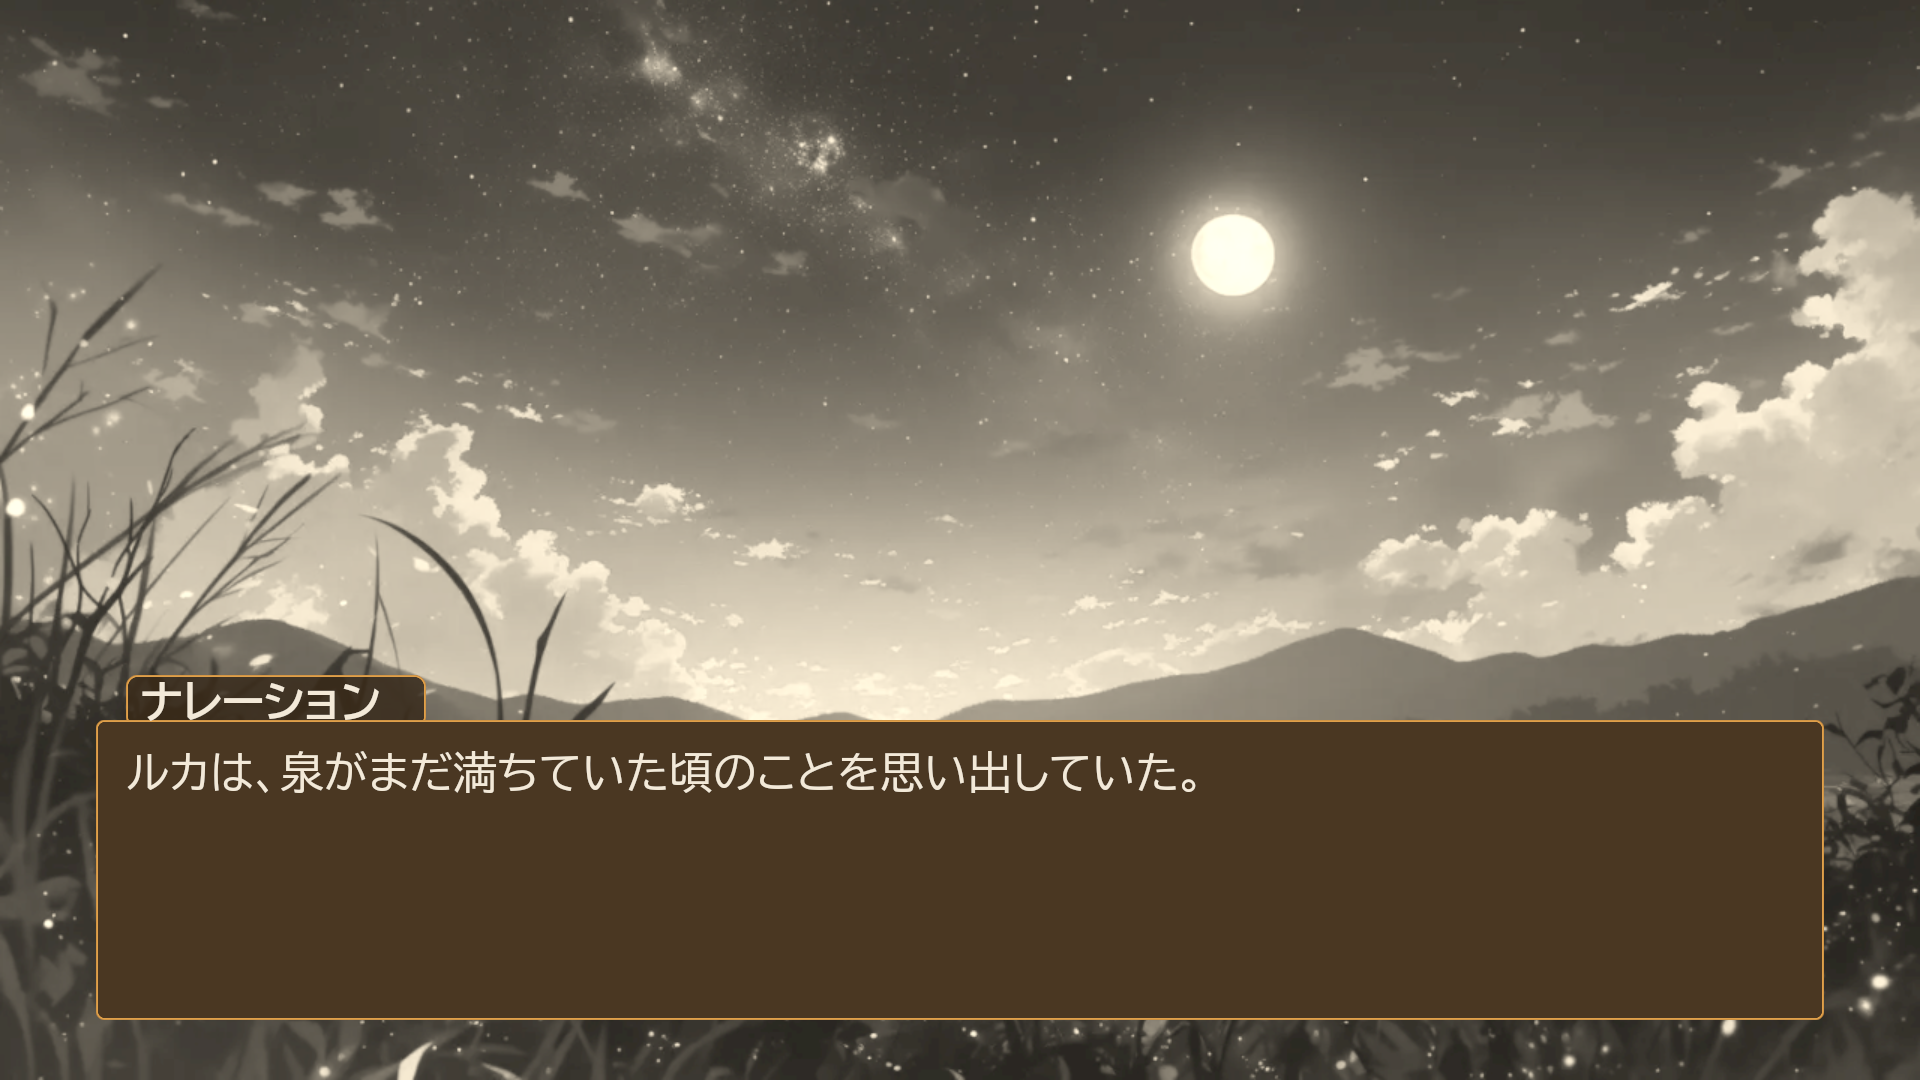
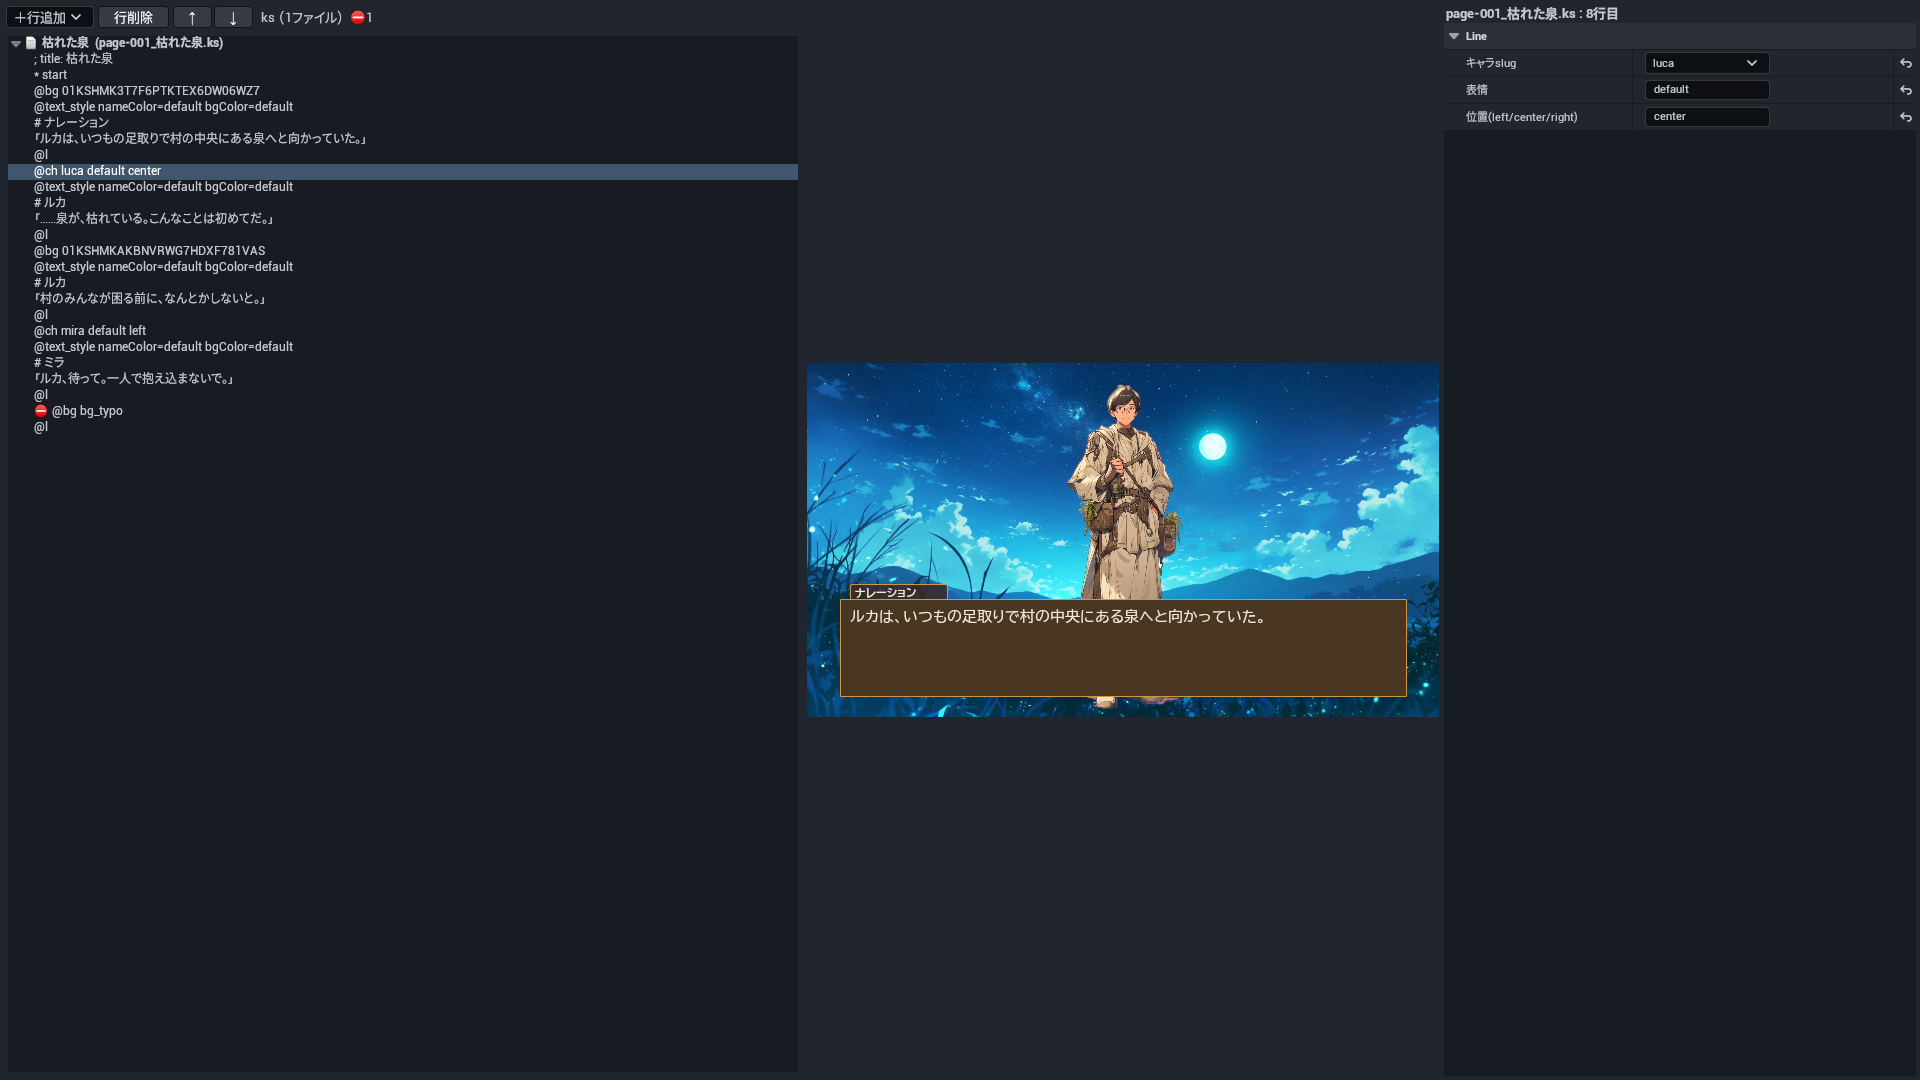
選択肢 画面のフィルタ(セピア) KS 台本エディタ
選択肢 画面のフィルタ(セピア) KS 台本エディタ(台本の木・プレビュー・欄。足した無い絵の行〔@bg bg_typo〕に付いた検査の印は例)
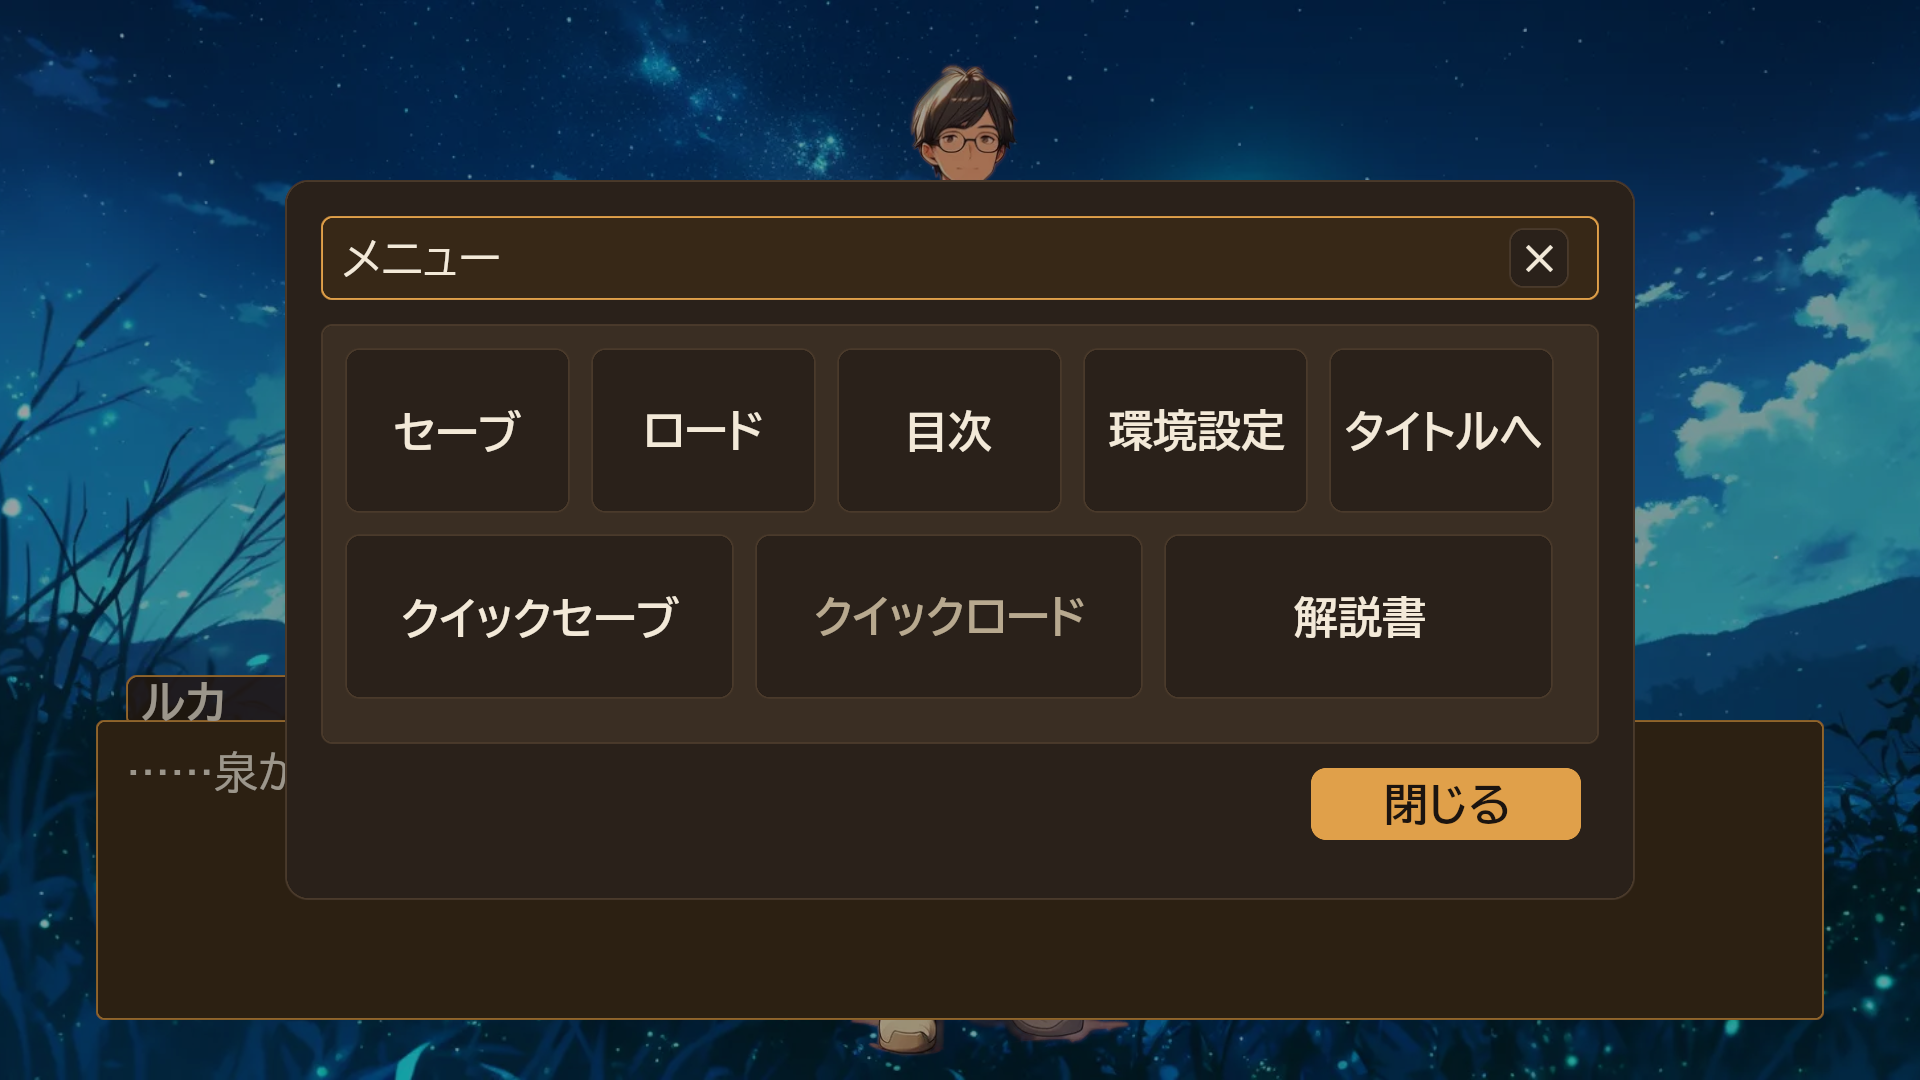
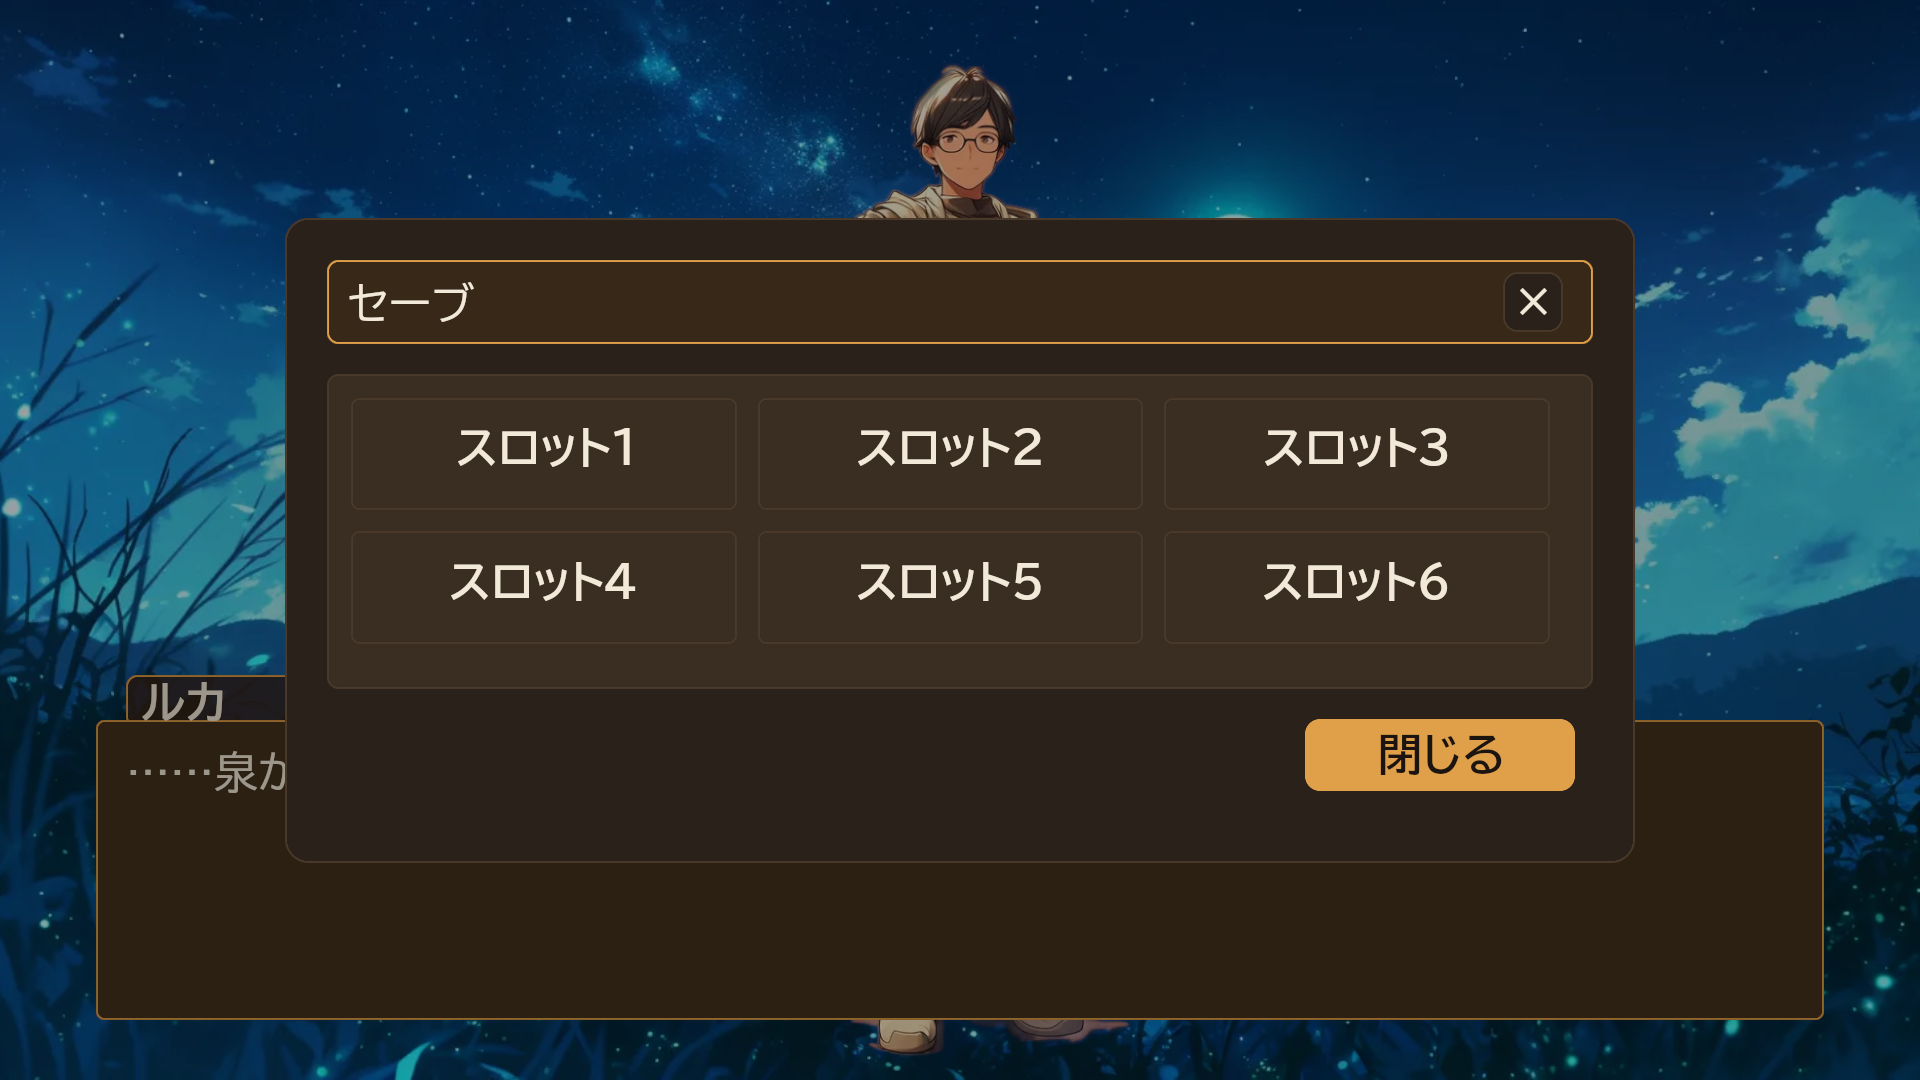
メニュー セーブ コンフィグ
メニュー セーブ コンフィグ

選択肢とフィルタの絵は、見本の話の後ろに選択肢とフィルタを足して撮ったものです(見本の 1 話には入っていません)。


3. 要るもの


4. 作品のフォルダ

KaedeVN は、作品のデータを 1 つのフォルダ(作品の置き場)から読みます。場所は 編集 → プロジェクト設定 → Plugins → KaedeVN の WorkRoot で、既定は Game(プロジェクトのフォルダの直下)です。

場所 中身
works/<作品の id>/work.json 作品の題と、章の並び
works/<作品の id>/<章のフォルダ>/<話>.json 話のブロックの列。保存すると、隣に同じ中身の .ks・.ksc も書かれる
works/<作品の id>/scenario.json ビルドの出力。ゲームはこれを再生する(手で直さない)
ui/ ゲームの画面(MomijiUI の JSON。タイトル・メニュー・目次・セーブ・ロード・解説書・コンフィグ)
assets.json 絵の id → 絵のファイル。ブロックや台本は絵を id で指す
assets/ 絵のファイル(見本は背景 2 枚・立ち絵 2 枚)
projects/projects.json 書き出したゲームが遊ぶ作品の一覧(§1.9 の手順 4)

5. ゲームの操作

▶ プレイでも、書き出したゲームでも同じです。

操作 キーボード・マウス ゲームパッド
読み進める・決める クリック・Enter・Space A/✕
選ぶものを動かす 矢印キー 十字キー・左スティック
取り消す・戻る Esc・Backspace B/○
オート A L1
スキップ Ctrl(左) R1
クイックセーブ/ロード F5/F9 Y/△・X/□
メニュー — Start/+

6. テキストで書く(KS 台本)

ノベルエディタで組む代わりに、文字の台本(KS 台本)で書くこともできます。1 話を 1 つの .ks ファイルにし、1 行に 1 つ、命令か台詞を書きます。

; title: 枯れた泉
@bg forest
#ナレーション
ルカは、いつもの足取りで村の中央にある泉へと向かっていた。
@l
#ルカ
……泉が、枯れている。
@p
@jump next
行 意味
; … 注釈(ゲームには出ない)。先頭の ; title: は話の題
@bg forest 背景を assets.json の id forest の絵に替える
#ルカ 続く本文を「ルカ」の台詞にする(# だけなら地の文)
本文の行 台詞・地の文
@l・@p クリックを待つ(@p は本文を消して次のページへ)
@jump next ラベル *next へ飛ぶ

KS 台本は Tools → KaedeVN → KaedeVN KS台本エディタ で、行を木で見ながら直せます。このメニューは、プロジェクトの中の「KaedeVN KS台本プロジェクト」のアセット(台本のフォルダを指すデータアセット)を開きます。Fab で入れたばかりのプロジェクトにはこのアセットが無いので、「KaedeVN 台本プロジェクトが見つかりません」と出て何も開きません(§7)。いまは、ノベルエディタで組んで保存すると書かれる .ks を、文字の形として読む・写す使い方が確かです。命令の全部と引数はリファレンスの §4、KS 台本エディタは §5 にあります。


7. まだできないこと


8. 困ったとき

こんなとき 見るところ
メニューに「KaedeVN」が無い プラグインが有効か(編集 → プラグイン)。有効にしたらエディタを開き直す(§1.3)
「見本を置く」で作品が出ない 作品の置き場(WorkRoot)に書けるか。プロジェクトのフォルダの Game/works/fantasy_block_demo/ ができているか
絵が出ない 素材の id が assets.json にあるか・その道に絵があるか(ビルドの検査が「アセットが見つかりません」と知らせる)
▶ プレイで何も始まらない・別の画面が出る ビルドが「ビルド失敗」になっていないか(上の段の文)。設定の PreviewMap に、自分の GameMode を決めたマップを入れていないか(空なら今開いているマップで KaedeVN が遊ぶ)
書き出したゲームで台本が無い・見本でないデモが始まる Config/DefaultGame.ini の UFS の行(§1.9 の手順 3)と、Game/projects/projects.json(手順 4)。どちらも直したら、もう一度パッケージ化する
書き出したゲームで操作が効かない・ノベルが出ない デフォルトの GameMode が KaedeVnGameMode か(§1.9 の手順 2)
書き出しで「コードを組み立てられない」 Visual Studio とワークロード C++ によるゲーム開発 が入っているか(§1.2)
ログ・セーブを見たい 書き出したゲームは %LOCALAPPDATA%\<プロジェクトの名前>\Saved。エディタはプロジェクトの Saved/Logs
ビルドの検査の文の意味が分からない リファレンスの §6.1 に、出る文ごとの意味と直し方がある
目次Contents

KaedeVN — Setup guide

This guide is for KaedeVN 0.2.0 (2026-10-21).

KaedeVN is a free plugin for making visual novels inside Unreal Engine. This guide takes you from installing it on Fab to running the sample work and packaging it as a Windows game.

The editor's labels are currently in Japanese. This guide gives each label as "English meaning (Japanese label)" so you can find it on screen.

The title screen of the sample work "枯れた泉の守り人" (The Keeper of the Dried Spring)


Contents

  1. Your first path: from installing to packaging
  2. What the plugin can do
  3. What you need
  4. The work folder
  5. Game controls
  6. Writing in text (KS scripts)
  7. What it cannot do yet
  8. Troubleshooting

1. Your first path: from installing to packaging

This is the order for someone using KaedeVN in UE (Unreal Engine) for the first time, from installing it on Fab to packaging the sample work. Follow it from top to bottom and you can reach the end without reading the other chapters. Read the other chapters later, when you build your own work, and only the parts you need.

First, the overall order. KaedeVN is not a standalone app; it is a tool that runs inside the UE editor. So there is no step called "launch KaedeVN". You open a project in UE and open the novel editor from a menu (1.5). This guide says "launch" for starting a program (the launcher, UE, a packaged game) and "open" for bringing up a window or a work inside a running program (a project, the novel editor, a work).

Step What to do Where When it is done
1.1 Get KaedeVN and MomijiUI on Fab Fab and the launcher KaedeVN and MomijiUI are installed in UE
1.2 Install UE 5.8 and Visual Studio The launcher and Microsoft's installer You are ready to create a project
1.3 Create a C++ project and enable KaedeVN UE's Project Browser and the editor A project with KaedeVN opens
1.4 Place the sample work The novel editor The sample 枯れた泉の守り人 opens
1.5 Learn the novel editor's screen The novel editor You know what the four panes do
1.6 Change one line and save The novel editor The episode file is rewritten
1.7 Build and ▶ Play The novel editor You can play the sample inside the editor
1.8 Fix reported issues The novel editor No issues are reported
1.9 Package the game The UE editor A Windows exe is created

From the second time on, open the project you created in 1.3 and only do Tools → KaedeVN → KaedeVN ノベルエディタ (1.5). Steps 1.1 to 1.4 are needed only once.

1.1 Get KaedeVN and MomijiUI on Fab

KaedeVN draws its screens with another free plugin, MomijiUI. Get both.

  1. Sign in to Fab (fab.com) with your Epic Games account and choose "Add to My Library" on the KaedeVN page. Do the same for MomijiUI. Both are free.
  2. Both appear in the Fab section of Unreal Engine → Library in the Epic Games Launcher (the launcher). Press Install to Engine for each and choose 5.8. The plugins are installed under <UE folder>\Engine\Plugins\Marketplace\.

If UE 5.8 is not installed yet, do step 1 of 1.2 first and come back.

1.2 Install UE 5.8 and Visual Studio

  1. In the launcher's Unreal Engine → Library, press + next to the engine versions, choose 5.8 and press Install.
  2. Get the installer of Visual Studio Community (free) from Microsoft's website, run it, and install the workload Game development with C++. Use the latest 2022 (17.14) or the latest 2026: UE 5.8 refuses some older versions (2022 17.13 and earlier, and the first releases of 2026). If it is already installed, press Update in the Visual Studio Installer. KaedeVN is a C++ plugin, so you create the project as C++ (1.3), and packaging compiles the plugin's code into your game (1.9). That is why you need it.

1.3 Create a C++ project and enable KaedeVN

  1. Press Launch for 5.8 in the launcher.
  2. In the Project Browser, choose Games → Blank and select C++. Use only letters, digits and _ in the project name (for example MyNovel) and press Create. Visual Studio compiles the project's code and the editor opens.
  3. In the editor, open Edit → Plugins, find KaedeVN and tick it. When a window asks whether to enable MomijiUI, which KaedeVN needs, press Yes.
  4. You are told a restart is needed; restart the editor and open the same project.

Installing a plugin in the engine is not enough; you enable it for each project. You do this only once, right after creating the project.

1.4 Place the sample work

  1. Choose the menu Tools → KaedeVN → KaedeVN ノベルエディタ (the novel editor). The novel editor opens as a tab. It works whichever map is open.
  2. Press Place the sample (見本を置く) at the top. The sample work 枯れた泉の守り人 ("The Keeper of the Dried Spring", one chapter, one episode) that ships with the plugin is copied into the project's Game folder (the work folder, §4) and opened. Files you already have are never overwritten.
  3. If 枯れた泉の守り人 is shown in the Work (作品:) box at the top left, it is placed.

1.5 Learn the novel editor's screen

The novel editor has four panes.

Pane What is there
① Left The tree of chapters (folders) → episodes (files) in the work
② Middle The list of blocks in the selected episode (lines, backgrounds, sprites, branches and so on)
③ Top right The fields of the selected block
④ Bottom right The preview (redrawn as soon as you change a field)

Open the chapter "01_第1章" in ① and select the episode "01_枯れた泉"; its blocks appear in ②.

The novel editor: ① the chapter and episode tree, ② the blocks (a line selected), ③ the fields, ④ the preview

1.6 Change one line and save

  1. Select a text block (a line) in ②.
  2. Rewrite Body (本文) in ③. The preview in ④ changes at once. Speaker, empty for narration (話者(空=地の文)) is the name of the person who says the line.
  3. Save with Ctrl+S (or Save (保存)). Along with the episode file (.json), the same content is written as text scripts (.ks, .ksc) in the same folder.

You can add blocks with + Block (+ブロック) (it adds one after the selected block). There are 7 kinds: line (text), background (bg), sprite (ch), variable (set_var), jump (jump), branch (if) and choice (choice). Ctrl+Z / Ctrl+Y undo and redo.

1.7 Build and ▶ Play

  1. Press Build (ビルド). The whole work (in chapter order, then episode order) is compiled into Game/works/fantasy_block_demo/scenario.json and the checks run.
  2. Press ▶ Play (▶ プレイ). It builds and then starts the sample inside the editor (PIE). The map that is open now is fine.
  3. Press Start (はじめる) on the title screen, and advance with a click, Enter or Space (the sample is one short episode with a background, a sprite and four lines). When you have seen the line you changed in 1.6, press Stop (■) in the editor's toolbar to go back.

Playing the sample: background, character sprite, name box and text

1.8 Fix reported issues

Building checks for things that compile but break when played (a missing image, an empty line, a jump to an episode that does not exist, and so on: 15 kinds). Anything found is listed at the bottom of the novel editor. Click a row and the editor opens that episode and selects that block. Fix the field in ③ and press Build again. Issues never stop the build. The unchanged sample reports none.

The list of build issues: a copy of the sample with two mistakes (a mistyped background id and an empty line) was built, and the first issue was clicked to select its block

1.9 Package the game

When the sample plays in the editor, package it as a Windows game. The settings are needed only once.

  1. Make the game's map: choose File → New Level → Empty Level, then File → Save Current Level and save it under Content (for example NovelMap).

  2. Make KaedeVN the game's framework: in Edit → Project Settings → Maps & Modes, set Default GameMode to KaedeVnGameMode and Game Default Map to the map from step 1. This GameMode connects the novel's screens and controls (keyboard, mouse, gamepad).

  3. Put the work folder into the game: open Config/DefaultGame.ini in your project folder with Notepad, add these 2 lines at the end and save. Without them the packaged game starts but finds no scripts.

    [/Script/UnrealEd.ProjectPackagingSettings]
    +DirectoriesToAlwaysStageAsUFS=(Path="../Game")
    
  4. Choose the work the game starts: in the project folder's Game, create a folder named projects and, in it, a file projects.json with this content (UTF-8). The packaged game plays the first work in this list.

    {
      "projects": [
        { "id": "fantasy_block_demo", "title": "枯れた泉の守り人", "scenario": "works/fantasy_block_demo/scenario.json" }
      ]
    }
    
  5. Press Build in the novel editor once more to refresh scenario.json.

  6. Choose Platforms → Windows → Package Project and select an output folder. For a release build, set the packaging configuration in the same menu to Shipping. Visual Studio compiles the plugin's code into your game.

  7. Launch the exe in the output folder. It starts at the sample's title screen.

A packaged game writes its logs and saves to %LOCALAPPDATA%\<project name>\Saved, not next to the exe.

For your own work, create it with New work (作品を新規作成) in the novel editor, then edit, play and package it in the same order as 1.6 to 1.9 (replace the id, title and scenario in the list of step 4 with your work's).


2. What the plugin can do

Only what works in UE is listed. Commands you can write in a script but that do nothing in UE yet are in §7.

Area What you can do
Novel editor Build a work as work › chapter › episode › block. 7 kinds of blocks: line, background, sprite, variable, jump, branch, choice. A preview that redraws as soon as you change a field. Undo / redo, per episode. Chapters are folders and episodes are files, so the structure is readable outside the editor too. The work's screen size (720p or 1080p)
Build checks 15 kinds of reports on things that compile but break when played (a missing image, an empty line or choice label, a jump to an episode that does not exist, duplicate ids and so on). Click a row to go to that block. The build is never stopped
KS scripts Plain-text scripts (.ks), one file per episode, with commands, lines, speakers, labels, variables, choices and branches. Saving in the novel editor also writes the same content as .ks
KS script editor Shows the script's lines as a tree, with the selected line's fields, a preview and checks (8 kinds). The KS script editor never rewrites your text: for KS scripts the text files are the source of truth
Bundled compiler kaedevn-ks-compile.exe (KS script → scenario.json), used by the KS script editor's build, and kaedevn-blocks2ks.exe (blocks → KS text), used when the novel editor saves. No external tools, no network access. The novel editor compiles blocks into scenario.json itself
Picture effects Backgrounds (with a dissolve), sprites (three positions, expression changes, moves), free sprites (pictures anywhere that you can move, fade and scale), text at a set position, overlays (rain, fog, frames and so on), hiding or fading whole layers, and layer transitions
Screen effects Color filters, shake, flash, fade to and from black or white, a single-color mask, camera moves (zoom and pan), and timelines (several moves arranged along time)
Flow Lines and narration, text reveal, line and page breaks, waiting for a click or for a time, choices, variables and branches, jumps, calls and returns, and KSC (small scripts inside a script: flags, item counts, arithmetic)
Game screens Title, menu, table of contents, save, load, manual and config (the sample's 7 screens; all are MomijiUI JSON, so each work can change them). Auto, skip, quick save and load. Of the config items, UE applies 4: text speed, typeface, window size and color theme
Controls Keyboard, mouse and gamepad (§5). The plugin binds them with Enhanced Input, so there is nothing to wire up in your project
Packaging Windows games. The game framework (GameInstance, GameMode, PlayerController) is the plugin's KaedeVnHost

A work is JSON and text scripts in the work folder (§4). You can see the differences in Git.

Choices Screen filter (sepia) KS script editor
Choices Screen filter (sepia) KS script editor (script tree, preview and fields; the error mark on the added line @bg bg_typo is an example)
Menu Save Config
Menu Save Config

The choice and filter pictures were taken with a choice and a filter added after the sample's episode (the sample's one episode does not have them).


3. What you need


4. The work folder

KaedeVN reads a work's data from one folder, the work folder. Its place is WorkRoot in Edit → Project Settings → Plugins → KaedeVN; the default is Game, directly under the project folder.

Path What it holds
works/<work id>/work.json The work's title and the order of its chapters
works/<work id>/<chapter folder>/<episode>.json The episode's list of blocks. Saving also writes the same content as .ks and .ksc next to it
works/<work id>/scenario.json The build output, which the game plays (do not edit it by hand)
ui/ The game screens (MomijiUI JSON: title, menu, table of contents, save, load, manual, config)
assets.json Image id → image file. Blocks and scripts refer to images by id
assets/ The image files (the sample has two backgrounds and two sprites)
projects/projects.json The list of works the packaged game plays (step 4 of §1.9)

5. Game controls

The same in ▶ Play and in a packaged game.

Action Keyboard and mouse Gamepad
Advance, confirm Click, Enter, Space A / ✕
Move the selection Arrow keys D-pad, left stick
Cancel, back Esc, Backspace B / ○
Auto A L1
Skip Ctrl (left) R1
Quick save / load F5 / F9 Y / △, X / □
Menu — Start / +

6. Writing in text (KS scripts)

Instead of building in the novel editor, you can write a text script (a KS script). Each episode is one .ks file, with one command or line per text line.

; title: 枯れた泉
@bg forest
#ナレーション
ルカは、いつもの足取りで村の中央にある泉へと向かっていた。
@l
#ルカ
……泉が、枯れている。
@p
@jump next
Line Meaning
; … A comment (not shown in the game). ; title: at the top is the episode's title
@bg forest Change the background to the image with id forest in assets.json
#ルカ Make the following text a line spoken by "ルカ" (# alone means narration)
A text line A line or narration
@l, @p Wait for a click (@p also clears the text and starts a new page)
@jump next Jump to the label *next

You can edit KS scripts in Tools → KaedeVN → KaedeVN KS台本エディタ (the KS script editor), looking at the lines as a tree. This menu opens a "KaedeVN KS script project" asset in your project (a data asset that points to a script folder). A project you just set up from Fab has no such asset, so the menu only shows "KaedeVN 台本プロジェクトが見つかりません" (no script project found) and opens nothing (§7). Today, the reliable use is to read or copy the .ks that the novel editor writes when you save. All commands and their arguments are in §4 of the Reference, and the KS script editor is in §5.


7. What it cannot do yet


8. Troubleshooting

When Where to look
There is no "KaedeVN" in the menu Whether the plugin is enabled (Edit → Plugins). After enabling it, restart the editor (§1.3)
"Place the sample" shows no work Whether the work folder (WorkRoot) is writable, and whether Game/works/fantasy_block_demo/ exists in the project folder
An image does not show Whether the image id is in assets.json and the file is at that path (the build check reports "アセットが見つかりません", asset not found)
▶ Play starts nothing, or another screen appears Whether the build failed ("ビルド失敗" in the status line at the top), and whether the PreviewMap setting points to a map with its own GameMode (empty means KaedeVN plays on the map that is open)
The packaged game has no script, or a demo other than the sample starts The UFS lines in Config/DefaultGame.ini (step 3 of §1.9) and Game/projects/projects.json (step 4). After fixing either, package again
Controls do nothing in the packaged game, or no novel appears Whether Default GameMode is KaedeVnGameMode (step 2 of §1.9)
Packaging says the code cannot be compiled Whether Visual Studio and the workload Game development with C++ are installed (§1.2)
You want to see logs or saves For a packaged game, %LOCALAPPDATA%\<project name>\Saved. For the editor, the project's Saved/Logs
You do not understand a build check message §6.1 of the reference gives the meaning and the fix for each message